
Disclaimer: This tutorial assumes you know how to work a solder iron.
Note: "Tinning" is when you apply a small amount of solder to make it easier to join the wire to the metal.
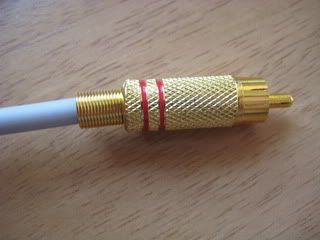
The photo size is rather large so you have a very clear image to compare to.
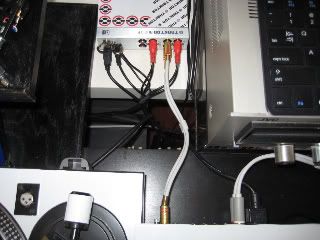
The reason I am writing this tutorial is simple. I have an 8 foot length of RCA cable and only need 6 inches of it. The rest ends up tangled, and I've noticed some distortion. So I went out and picked up 8 RCA connectors, and went to work.
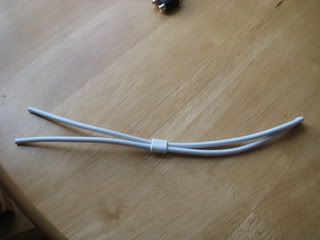
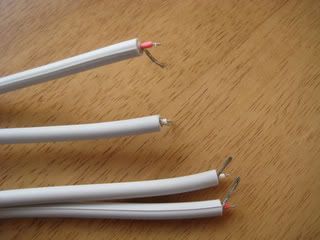
Step 1: Cut your cable to the length you need. Mine had a plastic square at each end to prevent splitting the wire all the way, so I used those as the centres.
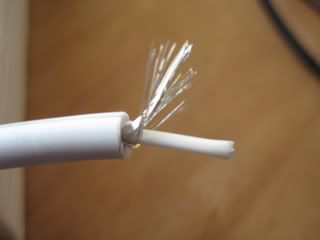
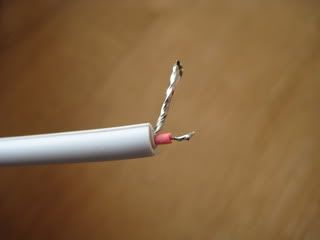
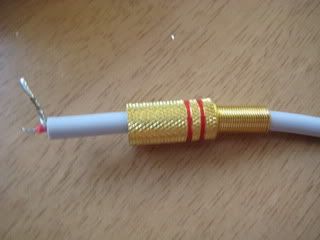
Step 2: strip the outside off of the wire. This will expose a central wrapped wire, and a lot of thinner wires all the way around. Pull the outer wires to one side, and twist them up.
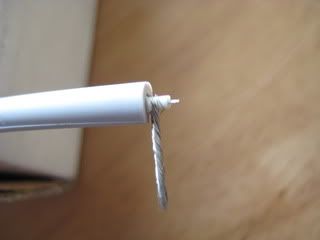
Step 3: Strip the inner wire, but leave it slightly longer than the coating on the outside of the whole chord. This central wire will be your signal wire, and the outside one you twisted is your ground.
Step 4: Do the same thing to the other 4 ends of the cable.
Step5: "Tin" the ground wire with a small amount of solder. Don't use too much, or the wire won't fit in the ground hole on the connector. "Tin" the signal wire as well.
Step 6: Rinse and repeat with the other 4 ends.
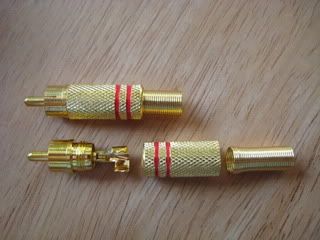
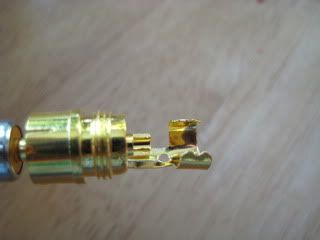
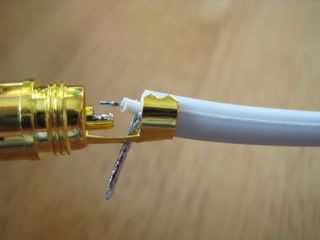
Step 7: take your connector and remove the outer shield. Connectors all look a little different here, but the next few steps are generally the same. You will have on the end that plugs in, a channel down the middle, and a metal ground with a hole in it, as well as 2 metal clamps which will hold the cable in place.
Step 8: "Tin" the centre channel. This is where your signal wire will go.
Step 9:
***MOST IMPORTANT STEP***
Slide the outer shield and spring, if you have one, over the chord you are attaching the connector to. DO NOT forget this step. I assure you, once you have soldered a beautiful connection and realise the shield is not on the chord, this project become less fun.
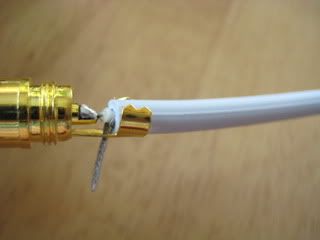
Step 10: spread open the metal clamps on the connector, and feed the ground wire through the hole. Pull it all the way down so that the signal wire is almost touching the centre channel.
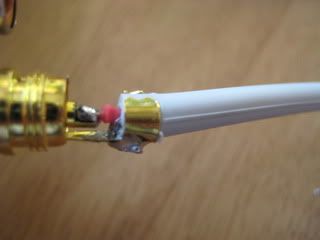
Step 11: Solder the signal wire to the centre channel. Make sure you don't keep the solder iron here too long, or you will melt the plastic inside the connector and will end up with a loose connection.
Step 12: Bend the ground wire back towards the cable, and solder it in place. The solder, combined with the bend in the ground wire and the metal clamps will keep your whole connector from ripping apart when you unplug it.
Step 13: Bend the metal clamps around the cable to secure everything together, and slide the shield up, and screw it all together.
Step 14: rewind, and do the other 4.
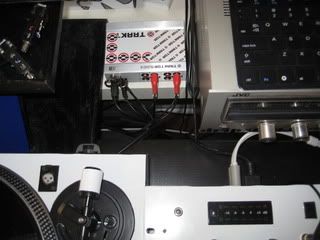
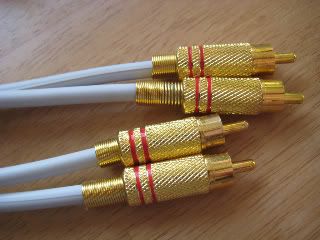
The new shorter cables sound just as good, if not better than the long ones. Everything is just al little neater now.

Results 1 to 10 of 27
-
11-28-2011, 07:12 PM #1Tech Guru


- Join Date
- Jan 2011
- Location
- my house in the great white north.
- Posts
- 1,727
 Shorten your RCA cables to avoid clutter
2 x gemini PT 1000 . Gemini PS-525 . X1
Shorten your RCA cables to avoid clutter
2 x gemini PT 1000 . Gemini PS-525 . X1
NI Audio 6 . Traktor Scratch pro 2
2007 Macbook Pro
 Originally Posted by The Mighty FV

-
11-28-2011, 07:16 PM #2
 DJTT Infectious Moderator

- Join Date
- Apr 2010
- Location
- Sherman, TX
- Posts
- 13,925
Great post!
-
11-28-2011, 07:33 PM #3Tech Guru
- Join Date
- Jan 2011
- Location
- my house in the great white north.
- Posts
- 1,727
Hey thanks a lot man. It wasn't as much work as i thought it would be, A lot of fun!
2 x gemini PT 1000 . Gemini PS-525 . X1
NI Audio 6 . Traktor Scratch pro 2
2007 Macbook Pro
Originally Posted by The Mighty FV
-
12-09-2011, 06:17 AM #4Tech Guru
- Join Date
- Jan 2011
- Location
- my house in the great white north.
- Posts
- 1,727
Out of curiosity, has anyone else made RCA cables, or any other cables? Since doing this write up, I've been hooked. Its cheaper to buy, but much more fun to make. This weekend I'm making some more RCAs, a 3.5mm to RCA, and a couple of RCAs that have 2 males on one end, and one male on the other end for a switch box project I came up with. <--more on that one when I get all of my parts. Am I the only DIY cable maker here? Lol
2 x gemini PT 1000 . Gemini PS-525 . X1
NI Audio 6 . Traktor Scratch pro 2
2007 Macbook Pro
Originally Posted by The Mighty FV
-
12-09-2011, 06:23 AM #5Tech Guru

- Join Date
- Dec 2008
- Location
- Bristol, UK
- Posts
- 6,481
I've got some 10ft RCA's that I used to use when my laptop was not near my decks, and I used a motu ultralite with mixvibes. They were high quality cables, and I haven't used 'em since I put my laptop on the desk with my decks.
Thanks for the write up - I'm gonna give this a bash...
Of course - you know where this leads, right??? Home made multicore cables...
I'm sure I could quite easily get addicted to cable making.DJ'ing: 2x1200MK2, DJM 850, Dicers, F1, Zomo MC-1000, Sony MDR-v700, i7 Win 10 HP Envy
Production: Ableton Live 8 and a mouse, Sennheiser HD400, Sony VAIO
Click HERE to D/L Free Tracks from Soundcloud!!!
https://www.facebook.com/Patchdj
-
12-10-2011, 04:06 AM #6Tech Guru
- Join Date
- Jan 2011
- Location
- my house in the great white north.
- Posts
- 1,727
Careful, cable making is like tattoos, gambling and smack, once you start, its all over hahah.
I'm making some single strand black cables with gold tips. Just discovered the joys of heatshrink.2 x gemini PT 1000 . Gemini PS-525 . X1
NI Audio 6 . Traktor Scratch pro 2
2007 Macbook Pro
Originally Posted by The Mighty FV
-
12-10-2011, 08:56 AM #7Tech Mentor

- Join Date
- Nov 2011
- Location
- The Netherlands
- Posts
- 141
Great work, and they look also good

i want to do this for a long time, but i'm affraid of that "tatoo" princip
-
01-03-2012, 04:30 PM #8Tech Mentor

- Join Date
- Dec 2010
- Location
- Ptown
- Posts
- 262
great post man! Thanks for all the clear pics!
-
01-03-2012, 04:55 PM #9Tech Guru

- Join Date
- Oct 2010
- Location
- From Ireland Living in Manila: Philippines :D
- Posts
- 3,667
Mmmmm heatshrinkJust discovered the joys of heatshrink.

-
01-04-2012, 02:51 AM #10Tech Guru

- Join Date
- Jun 2011
- Location
- Stockholm, Sweden
- Posts
- 629
I'd like to do this, but I can't for the life of me find any suitable cable around here :/


 Reply With Quote
 Posting Permissions
|
|
© 2023 DJTechTools
Bookmarks