
Really excited by this one as it allows APC40 users to configure the device as they see fit....
First drop a slicer onto an audio or midi track (after an instrument)....
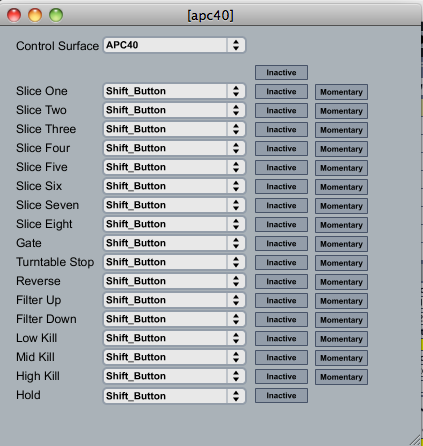
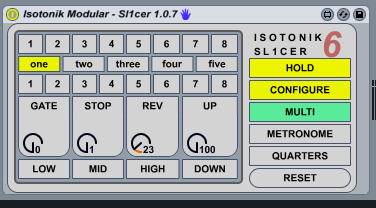
Then click the configure button...
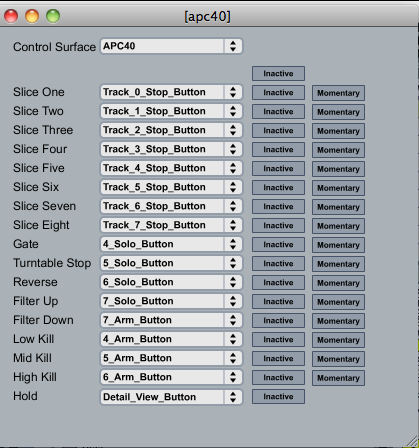
Then select which button you want for each action.....
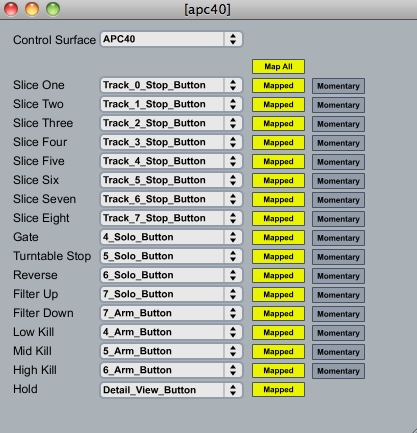
And Click the top Inactive button to map all the buttons..... If you want to leave some of the buttons unmapped by the control surface then click each Inactive button individually....
If you want the default action of the button to be a toggle rather than a momentary then change the status of the far right button per control (this is permanent and won't then be effected by the Hold functionality)
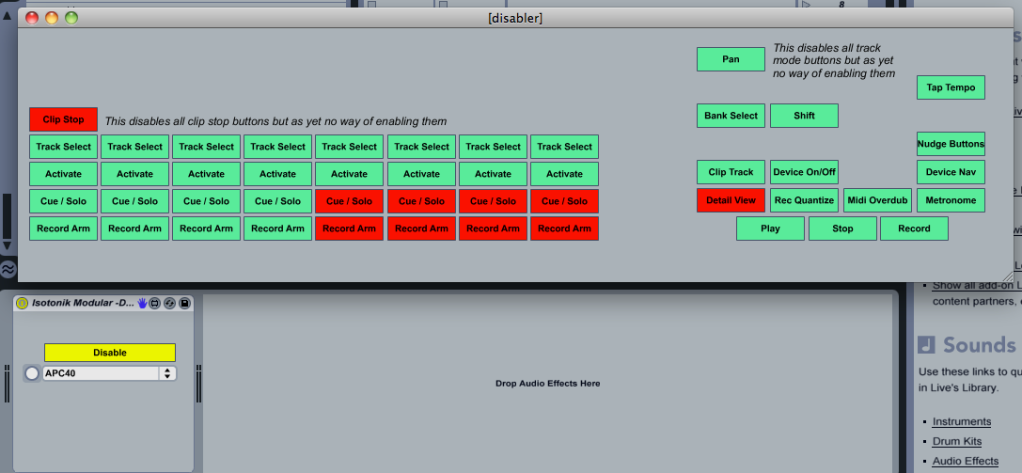
Next drop a D1sabler 1.0.5 device on the master track and click the diable button to open the floating window, turn red the buttons you have mapped within the Sl1cer device and click the button next to the APC40 drop down menu....
And now the device is ready, when you save the set the settings are saved so you only need to do this once!
The Hold functionality turns the 8 slice buttons and 8 effect buttons into toggles rather than momentary actions and the lights on the APC40 light up accordingly....
The metronome button turns on the running lights to give you visual feedback on your midi device of which Slice is playing at that time....
The Quarters button can be changed to Eights to capture just one bar of audio rather than two and have smaller slices....
The reset button is subject to a loadbang but sets up the filter effects parameters....
The Dial below Gate is a crossfade for the slices, i like it up full but when you are using the Gate effect you can soften it's edges using this...
The Dial below the Stop button controls the speed of the turntable stop from sharp to a slow turn off, think the TT's stop button with it to the left and turning the power off with it to the right....
The Dial below the Rev button controls the speed of the reverse, all the way to the left is normal time backwards but turning it up gives a quicker speed....
And finally the Dial between the Up and Down Buttons controls the rate at which the filter acts on the audio.....
You could do this with a Launchpad as well but i don't have one myself to create a D1sabler device specific to it..... (anyone near Dunstable that wants to donate one for a week or so gets free entry to the dropbox!)
Cheers
D

Results 21 to 30 of 30
Thread: Isotonik 6 - Now Available!!
-
09-21-2010, 03:41 PM #21Tech Mentor

- Join Date
- Nov 2008
- Posts
- 351

-
09-22-2010, 01:09 PM #22Tech Mentor
- Join Date
- Nov 2008
- Posts
- 351
Isotonik Modular Series - S3nd5 1.0.1
A new one for you all....
http://www.youtube.com/watch?v=j5_sDTX7hro
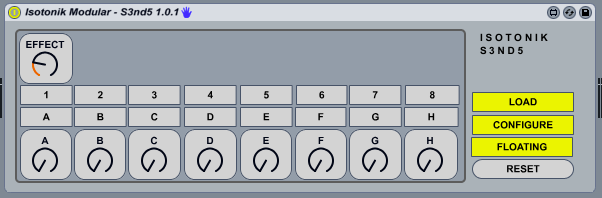
This device gives you quick and easy control over 8 sends of the track in focus, you can control them with dials or turn them on and off using the buttons A - H....
Combine the device with R3turn though and the real fun begins!!
Now mapping buttons 1 - 8 will not only route the audio of the track in focus to a return track but it will also fire a dummy clip that controls the rack within that return.....
More details at my blog thestudiosessions.co.uk including how to get hold of this and my other devices...
Cheers
D
-
09-23-2010, 05:48 AM #23Tech Mentor
- Join Date
- Nov 2008
- Posts
- 351
Hi All,
Just to let you know i'm going to be away for a week leaving in an hour or so, as the dropbox invitation process is a manual affair there may be some delay in sending new members the invites. I know i get a batch every month around payday so wanted to apologise in advance... I'm taking my laptop with me so if i can get online there won't be a problem...
Cheers
D
-
10-01-2010, 02:50 PM #24Tech Mentor
- Join Date
- Nov 2008
- Posts
- 351
http://www.youtube.com/watch?v=k3SXje0QB-Y
A considerable update combing R3turn and S3nd5 in one device...
Cheers
D
-
10-04-2010, 05:02 PM #25Tech Mentor
- Join Date
- Nov 2008
- Posts
- 351
-
10-19-2010, 03:19 AM #26Tech Mentor
- Join Date
- Nov 2008
- Posts
- 351
Hi All,
Been a bit quiet for a week or so whilst i've been organising a new set, warping and splitting classics and acapellas! In the meantime i've found a bit of spare time to finish the last couple of features on my main Isotonik template....
1: Dummy - Is now fully integrated into the M4ster device, when you press the Send B button a floating window pops up giving you a visual on the dummy clips available, to reset to manual keep Send B Pressed whilst pressing the tap tempo button or to change the dummy clips keep Send B pressed whilst you press Nudge - or +
2: CDJ Play - Press Metronome and Track Select 8 and the Activator / Solo / Rec buttons give you the ability to launch the highlighted clip, launch the currently playing or last clip played whilst the lat option is to play the clip below the currently playing one....
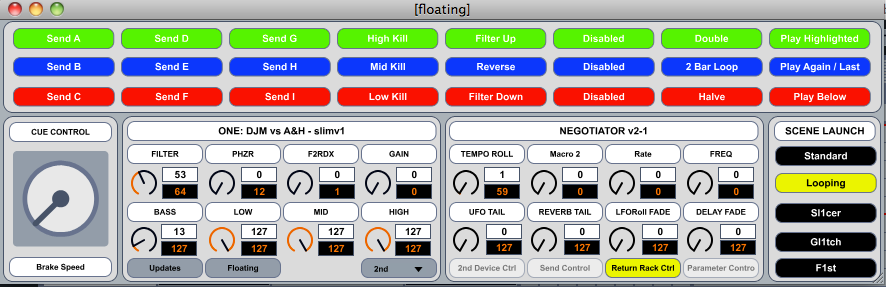
As i've been playing it came to me that whilst i wrote the device i still forget mid set how to reach all of the options, one of the downsides of the excellent NativeKontrol work was for me that i couldn't memorise what each of the buttons did, (NativeKontrol by the way still has functionality that Isotonik doesn't) as a result i invested in Max4Live and so now i've returned to my original plan of having a proper GUI that updates to let you know what's in control...
Obviously to change the focus of anything needs a press of a Mode Button (Pan, Send A, B, C, Metronome etc..) so when you press any of these a floating window will pop up to guide you....
As ever the entry to the dropbox which includes all future updates is through the paypal button on the right....
And in other news, i'm just sitting with my new Launchpad!!
Cheers
D
-
10-22-2010, 06:25 AM #27Tech Mentor
- Join Date
- Nov 2008
- Posts
- 351
This device allows you to map 8 midi notes for full control, you can then punch in a set loop length quantized to the nearest bar...
Loops can also be halved or doubled....
Map the Radio Button to a midi knob and the Loop On / Off button to a midi note and you can also choose the loop lenght and then set the loop...
With the device i've exposed a Loop Length parameter, when drawing in a value you'll set a loop at the start of the envelope equivalent in bars length to the value of the envelope...
The next version will give the option of Multi or Solo, i've dedicated the USer 1 bank on my launchpad to give full control over 8 tracks but as many people have limited controls left to map the Solo option will then allow you to only control the track in focus...
This is just one of the many modular max4live devices in my dropbox, further details can be found at thestudiosessions.co.uk or if you have questions then darrenecowley at sky dot com
Cheers
D
http://www.youtube.com/watch?v=DxYUbM9dty4
-
10-26-2010, 02:33 AM #28Tech Mentor
- Join Date
- Nov 2008
- Posts
- 351
And now reviewed by Abletoncookbook!
http://bit.ly/90Cqet
Cheers
D
-
11-06-2010, 04:20 AM #29Tech Mentor
- Join Date
- Nov 2008
- Posts
- 351
I made some manuals....
Hi All,
I've made some simple manuals for a few of the Modul4r series devices, i've also moved away from the nightmare that dropbox became and have settled in nicely at Sugarsync.....
Sm4rt 1.0.1 Manual
F0llow 1.0.5 Manual
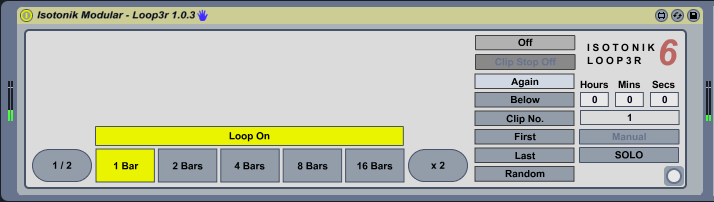
Loop3r 1.0.3 Manual
The update to the Loop3r device came about as a request for a more compact set of midi mapping..... With 5 Loop Length Buttons, a halve and Double Loop option plus a Loop On/Off Button, you need 8 buttons per track to have full userability.....
Option 1: Buy a Launchpad, select User 2 and map away
Option 2: Change the Multi Button (New) to Solo, then map the same 8 controller buttons to every instance of the device, the controls will only act upon the track in focus, like blue handing the device....
Option 3: Not got 8 buttons spare? Then mapping a midi knob to the bottom half of the loop length chooser and three buttons, one to Loop On/Off and one each to Halve and Double, will give you the same level of control....!
Apart from that i've been making a few custom devices, the biggest one has been for Benji Boko that's nearly finished that gives him a live looping setup using User 2 on the Launchpad, more details on this soon as Benji prepares for his album release and gets reedy to use it on his live tour....
Cheers
D
-
11-06-2010, 05:04 PM #30Tech Mentor
- Join Date
- Nov 2008
- Posts
- 351
http://www.youtube.com/watch?v=74G8WIsksZs
A bit of a tutorial on the D1sabler device and how to integrate it with the Sl1cer and an APC40....
Cheers
D

 Reply With Quote
 Posting Permissions
|
|
© 2023 DJTechTools
Bookmarks