
Ok, so I'm picking up a novation launchpad tomorrow to use with Traktor and plan to add a build to it. I was hoping someone might be able to help me with what materials and electronics I need, and also drivers etc. I want what I am building to run off USB of poss.
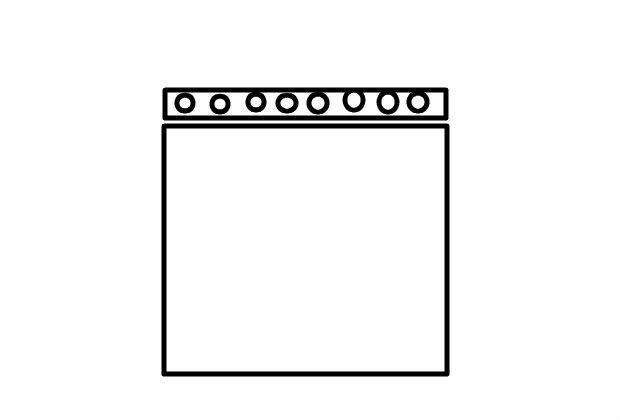
Ok, excuse the poor drawing skills, this is what it will look like from the top. The big square is the launchpad (couldn't be arsed to sit there drawing all the buttons on it). The rectangle on the top with the little circles in it is supposed to be a strip of rotary dials (this is what I am planning to build). I plan to have a USB port on the end of the right hand side of the strip of dials. I would also if possible like to have say the far right dial to be an endless knob to use for scrolling through Traktor.
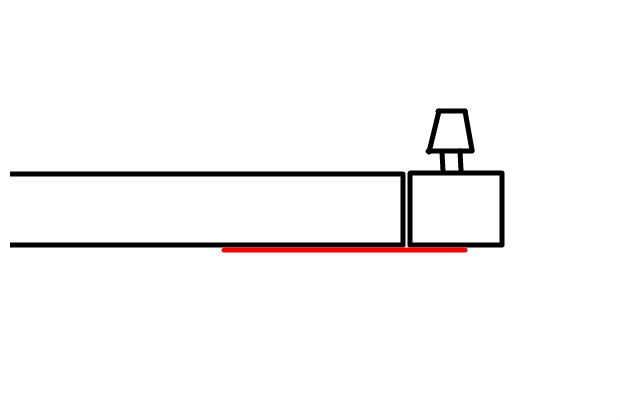
This is the side view, I forgot to include the USB port on the strip of dials but as you look at it from this view imagine there is a USB port on the end facing you (I'd like to use a mini USB socket like on a nanopad if poss). The red line is what I am planning to use to join the dials to the launchpad making it one unit. I am thinking something along the lines of strips of metal and I am hoping I might be lucky enough to be able to unscrew some existing screws in the launchpad and drill through the metal then, say the metal is like 3mm thick, I will replace the launchpad screws with screws 3mm longer then screw through the holes in the metal back into the launchpad (provided the screws are in a good place on the launchpad to begin with).
This is the underside to show how I plan to position the metal strips (something along those lines anyway), the black dots are supposed to be the screws.
So anyway yeah, if anyone can tell me what I'd need i.e. what I could use for the casing, what dials I should get, the midi PCB board (if that's what is called), and so on.
Any help greatly appreciated.
Cheers

Results 1 to 10 of 12
-
02-11-2010, 01:12 PM #1Tech Guru

- Join Date
- Dec 2009
- Posts
- 757
 Can someone help me with this build (what do I need)
-
02-15-2010, 06:19 AM #2Tech Mentor

- Join Date
- Feb 2009
- Location
- Cumbria, UK
- Posts
- 103
Hah, I had the exact same idea! Im planning on using an arduino nano as the brains with the roland serial usb midi hack. Im trying to find a sutiable sized hobby case for the enclosure just for ease and speed.

The depth of the rotary knobs means they cant sit flush with the launchpad. My solution (see above) is to sit the launchpad at an angle, iv actualy found this a more comfortable way to work.
Im planning on starting this build in the next few weeks, i can send you circuit diagrams/code when its done if you like?Live 8 / X-session Pro / KP3 / SCS.3D / Launch Pad / Pacemaker
And a large pile of custom diy midi controllers
-
02-15-2010, 06:58 AM #3Tech Mentor
- Join Date
- Feb 2009
- Location
- Cumbria, UK
- Posts
- 103
Just found these two side by side are the perfect dimensions for the enclosure (just create a full length face plate) and uber cheap too!
http://www.maplin.co.uk/Module.aspx?ModuleNo=1666Live 8 / X-session Pro / KP3 / SCS.3D / Launch Pad / Pacemaker
And a large pile of custom diy midi controllers
-
02-15-2010, 11:11 AM #4Tech Guru
- Join Date
- Dec 2009
- Posts
- 757
Hey man, thanks for the response. So the plastic casing you found is obviously deeper than the hight of the launchpad, is that the only reason you are planning to build a casing that will make it sit at an angle? I personally would sooner have it at the same hight so the launchpad sits flat as opposed to angled towards you, more for the fact it'll fit better in my bag. If you are saying the casing has to physically be deeper due to the electronics fitting inside then I might have to rethink my plan. The casing you found at maplin looks cool, obviously because it is deeper I'd be happy to file it down to sit at the same hight, but again provided the electronics will all fit inside. I'm assuming you are going to use 2 of those cases right? They are just over half the length of the launchpad so again I'd probably have to shave off a few mm to make the edges sit flush.
So basically I think I am at the stage of finding out whether the electronics will fit. I need to house them all in a case thats 240mm long and 20mm high. Do you know if this will be possible?
Thanks
-
02-15-2010, 01:01 PM #5Tech Mentor
- Join Date
- Feb 2009
- Location
- Cumbria, UK
- Posts
- 103
I have a pretty good selection of pots at hand, the average depth (of the part which sitts inside the case) is arround the 12mm mark so in theory you could keep the enclosure the same depth as the launchpad the problem is you need to fit the other electronics in their (also i will be adding foot switches to use as bank selectors for the knobs among other things). Their are a few ways arround this you could make the case wider and have the board sit beside the pots but i dont like the idea of this and i find the launchpad more accessible when its at an angle.
My thoughts were that i would create a cradle to house the two units while in use which slots together. The two advantages of this being it will flat pack for transportation as you pointed out and i wont need to make any modifications to the launchpad thus voiding its warranty. I'll sketch it up tomorrow if i get a chance.
Oh and the dimensions given for the cases on the link are internal it will be 2-4mm larger externaly. I will cut the ends off two of them and glue them together at the correct length then cut a new face place that spans both of them. Im not planning on making a case from scratch because I want this to be a quick build and cutting acrylic then drying glue etc would add atleast an extra evening to the construction time =)Last edited by CerebralExcretion; 02-15-2010 at 01:07 PM.
Live 8 / X-session Pro / KP3 / SCS.3D / Launch Pad / Pacemaker
And a large pile of custom diy midi controllers
-
02-15-2010, 02:16 PM #6Tech Guru
- Join Date
- Dec 2009
- Posts
- 757
Ok, so when you say I'd need to fit the other electronics in what other electronics are there? You got the pots, the wires and the midi brains. What else would need to fit? Cos if that's it I'd sooner just loose a pot or 2 to make the midi board fit in so it retains the same width as the launchpad. Is that possible?
Thanks
-
02-15-2010, 02:18 PM #7Tech Guru
- Join Date
- Dec 2009
- Posts
- 757
Oh, and is it possible to have one of the pots as an endless knob so that I an use it for scrolling in Traktor? If I am literally gonna have say around 6 knobs, is that midi board you recommended the smallest I can get or is there something smaller?
Cheers
-
02-15-2010, 03:05 PM #8Tech Mentor
- Join Date
- Feb 2009
- Location
- Cumbria, UK
- Posts
- 103
Their may be smaller but you will probably have to build them your self the arduino nano is pertty damn small (also i always keep a spare one in my bits box). It has a usb mini port so you dont need aditional hardware to program it which I find way more convinient when it comes to fine tuning.
The nano is 8mm deep so their may be enough room to house it under the pots if you are very organised with your wiring but it will be very tight and difficult to trouble shoot any issues. Another consideration is that you will need to use electrical tape or an equivalent to prevent shorts, electrical interfirence may also become an issue in when components are packed in so tight (but dont quote me on that).
You can make any combination of pots, encoders, and switches you want on the nano, their are 8 analog inputs (needed for the pots) and plenty of digital inputs (for the encoders and switches). You could even have a row of pots and a row of encoders if you wanted.
As you point out the core components will just be the pots and nano for the most basic implimentation. So if you wanted you could drop two pots to make room for the nano. This just fells a bit limited to me i would want a push switch with an led indicator to allow for multiple banks. Also its so easy to add foot switches ill be adding a few of them to one for switching banks and a few for triggering sends/reurns etc.
EDIT - Think this is the smallest commercially available arduino:
http://arduino.cc/en/Main/ArduinoBoardMini
but as i said you will need one of these too:
http://arduino.cc/en/Main/MiniUSBLast edited by CerebralExcretion; 02-15-2010 at 03:14 PM.
Live 8 / X-session Pro / KP3 / SCS.3D / Launch Pad / Pacemaker
And a large pile of custom diy midi controllers
-
02-15-2010, 06:27 PM #9Tech Guru
- Join Date
- Dec 2009
- Posts
- 757
Cool, sounds good. I know it may be a bit basic but thats all I need to be honest. I got plenty of buttons on the launchpad to play with, all I need is a few rotary knobs for the FX in Traktor. I currently have a nanokontrol and all I am using is 4 rotary knobs on it and am getting on fine, I don't really need too many FX. I guess I could include a couple of buttons just as on/off switches for the deck FX. thanks for your help man. Just one thing, I couldn't see a price for those 2 links you gave me. Would it work out cheaper to buy those 2 or should I just go for the first one you recommended? I think it was around £30 wasn't it.
Oh and when you say I don't require any additional software, is it all just plug and play or will there be some software to deal with at some point?
Cheers
-
02-15-2010, 07:09 PM #10Tech Mentor
- Join Date
- Feb 2009
- Location
- Cumbria, UK
- Posts
- 103
I think you can get the nano for arround £15 (i get them cheap on ebay) the other solution will be arround the same price for the unit then i think the programming head is another £20 on top its only really cheaper if you plan on using quite a few of them thats why i just get the nano's on ebay when they are going cheap.
So if you went with the nano (£15) the cases i suggested (£4) and say 6 pots (£10) your looking at arround £30-35. Though you will also probably want tol get knobs to go on the pots they will be another £5ish.
"when you say I don't require any additional software" dont recall saying that but regardless, arduino dosent transmit midi conventionaly over the usb their are various ways to get arround this using a pc their is a roland usb serial driver which you can use to make it work, i know their are solutions for mac too though i have no experiance with them. Alternativly you can easily add a standard 5 pin midi socket and use a usb to midi cable to transmit standards compliant midi which will work with a pc, mac or any synth/drum machine you may have.Last edited by CerebralExcretion; 02-15-2010 at 07:37 PM.
Live 8 / X-session Pro / KP3 / SCS.3D / Launch Pad / Pacemaker
And a large pile of custom diy midi controllers


 Reply With Quote
 Posting Permissions
|
|
© 2023 DJTechTools
Bookmarks