I started planning this table…back in November so that was around 8 months ago…that’s depressing. Anyways, with me working out of town for a good portion of that, and a 1 month long holiday, it seemed that it was taking forever to build this damn thing.
I started out with the idea that I’ll build one of those IKEA hack tables and the project grew and grew from there to what it is now. It’s probably 90% complete now, but I’ve got to round up the progress pictures I’ve taken as well as upload some videos of the thing in action onto YouTube (I’ll try to do that tonight). I’ve also got to finish up the rest of the table for a party I’m throwing next weekend which has been the main motivation to finally finish this guy off. Anyways I’ll get some pics going here.
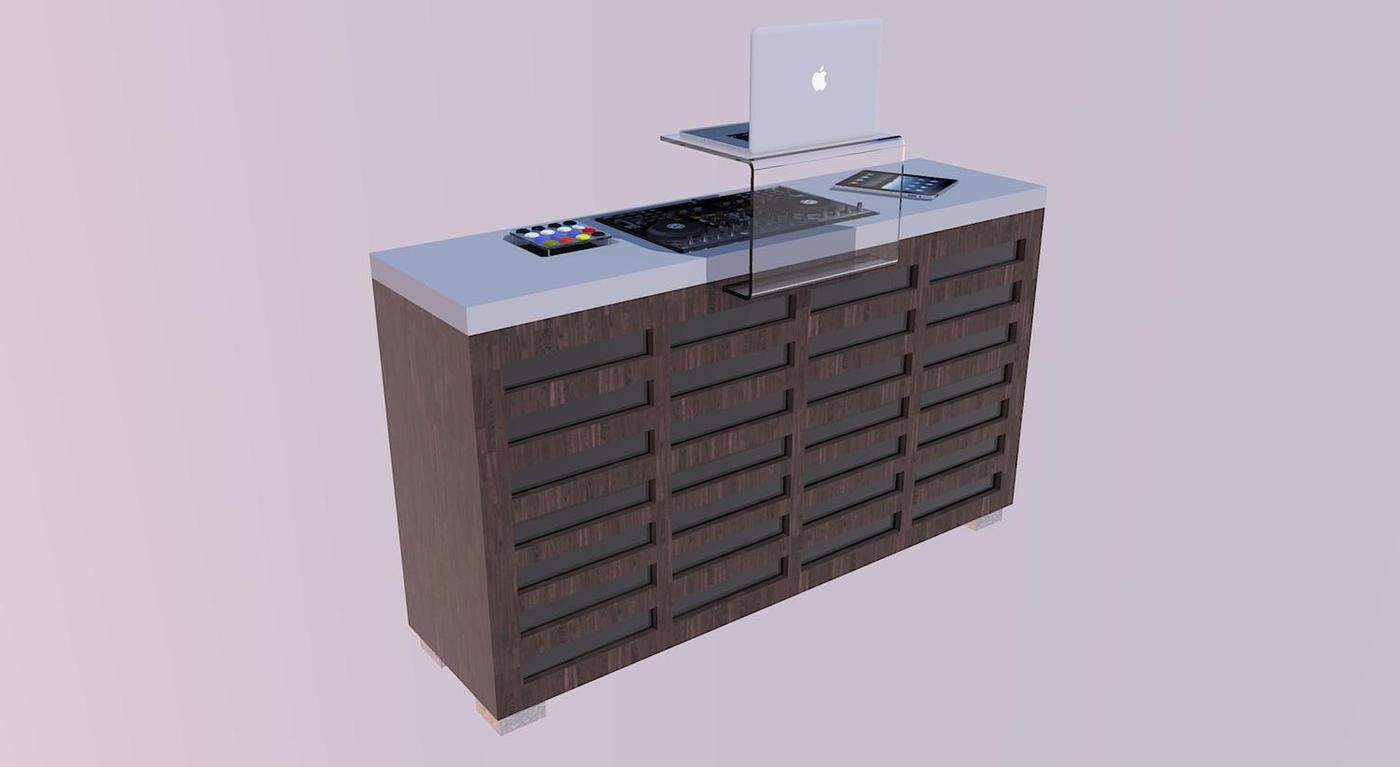
Okay so here are the concept pictures. I used SketchUp to do it all which was awesome. I’ve done 3D modelling a long while back with a program called Lightwave 3D but it seemed that for quick idea sketching, and at the end, for measurements, SketchUp fit the bill nicely and had the ability to import some great models (like the Traktor s4) very quickly and easily. Here were the final renders of the table, one just sitting normal, the other with the lighting fully operational.
Haha that’s funny you mention that, it’s really the look I was going for. A relatively unassuming piece of furniture (the acrylic laptop stand sort of disappears so it just looks like a bar really) during the day and a flick of the switch turns it into a full on light show. I went with rope lighting for the lighting, 25 feet per bank. You’ll see it in late posts going all in. in retrospect I think I would have done the lighting a little different since I’m a bit of a perfectionist and I don’t like being able to see the LED’s at all. I have a better idea now for setting up the lighting but all in all it came out quite nice, and very bright.
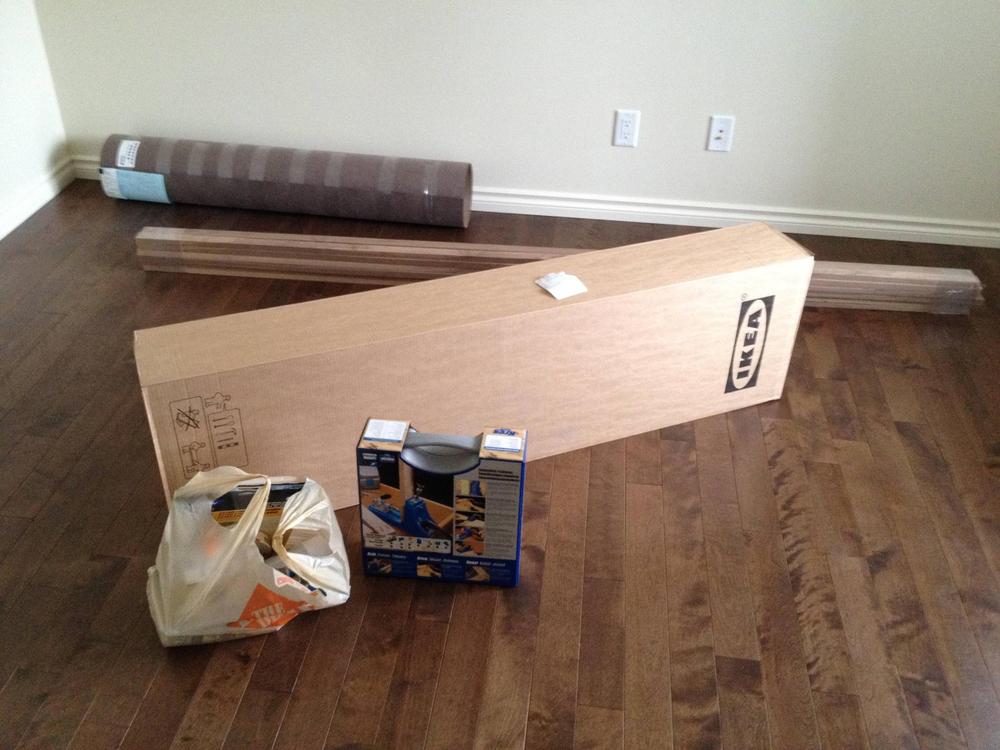
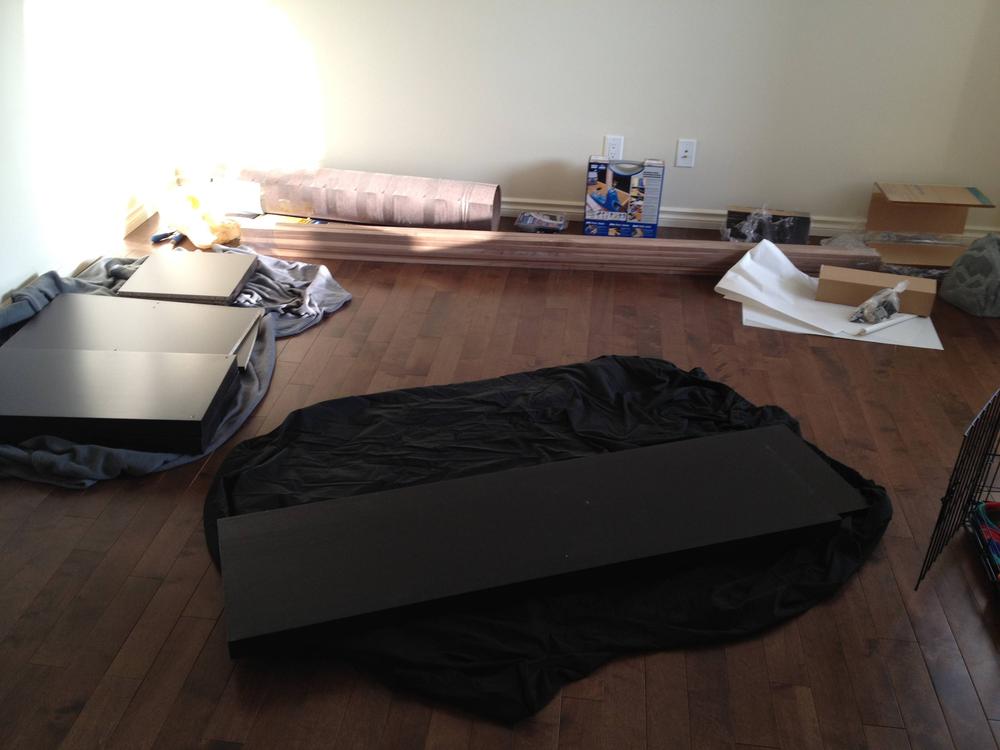
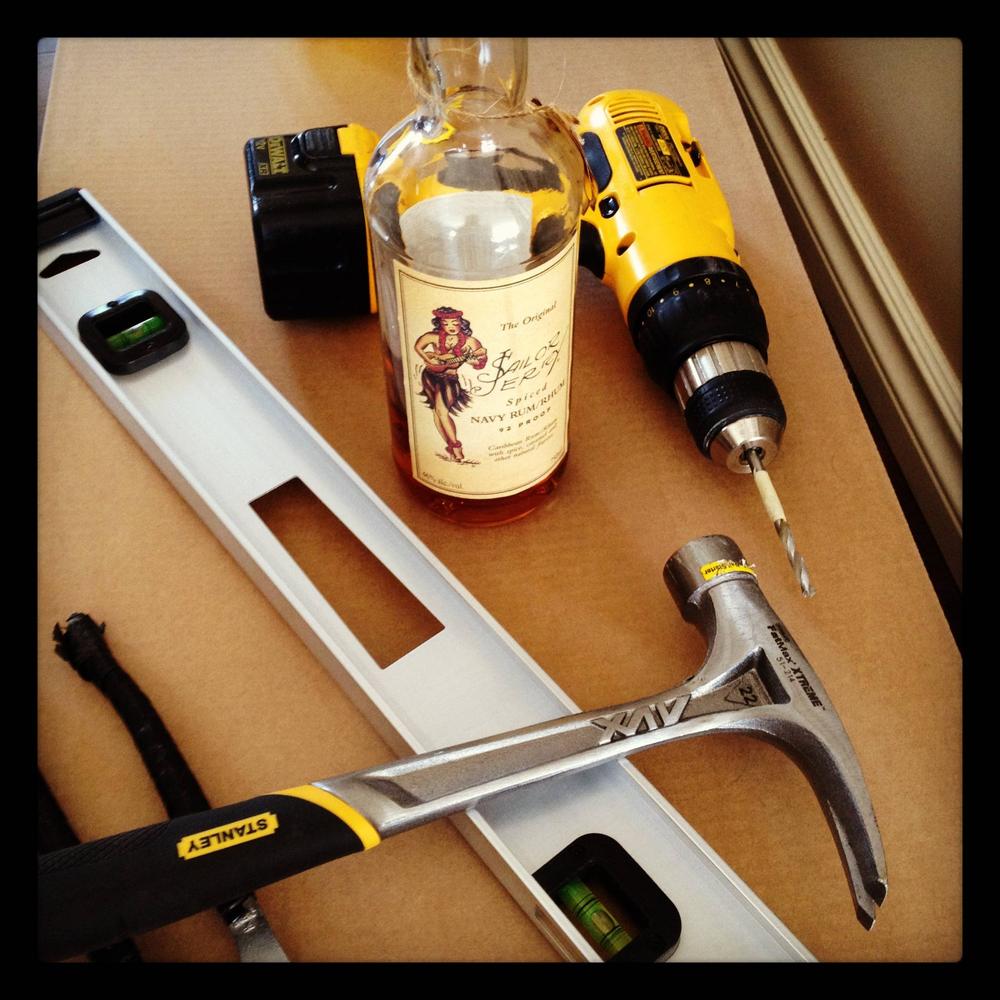
Okay so the basis for the unit (the skeleton I guess) is the IKEA Expedit bookshelf. In hindsight, and if I were to build another one of these, I’d just use MDF or a hardwood. I ended up buying 3 of these things to get the required number of shelves for the lighting and now have a small IKEA graveyard that I’ll end up building some sort of storage unit with. I got to work and drilled out the extra spots for the added shelves and dowels. I little rum and coke to keep the project fueled as well.
On to some electrical goodies, I used the XLO-5 light organ with it’s controller to control the lighting banks. Since I wasn’t a fan of the initial control panel cover I’ll end up making my own out of white acrylic. I also don’t like the rocker it comes with so I’ll be putting in a vandal switch that has a blue illuminated ring around it which should look quite a bit cooler.
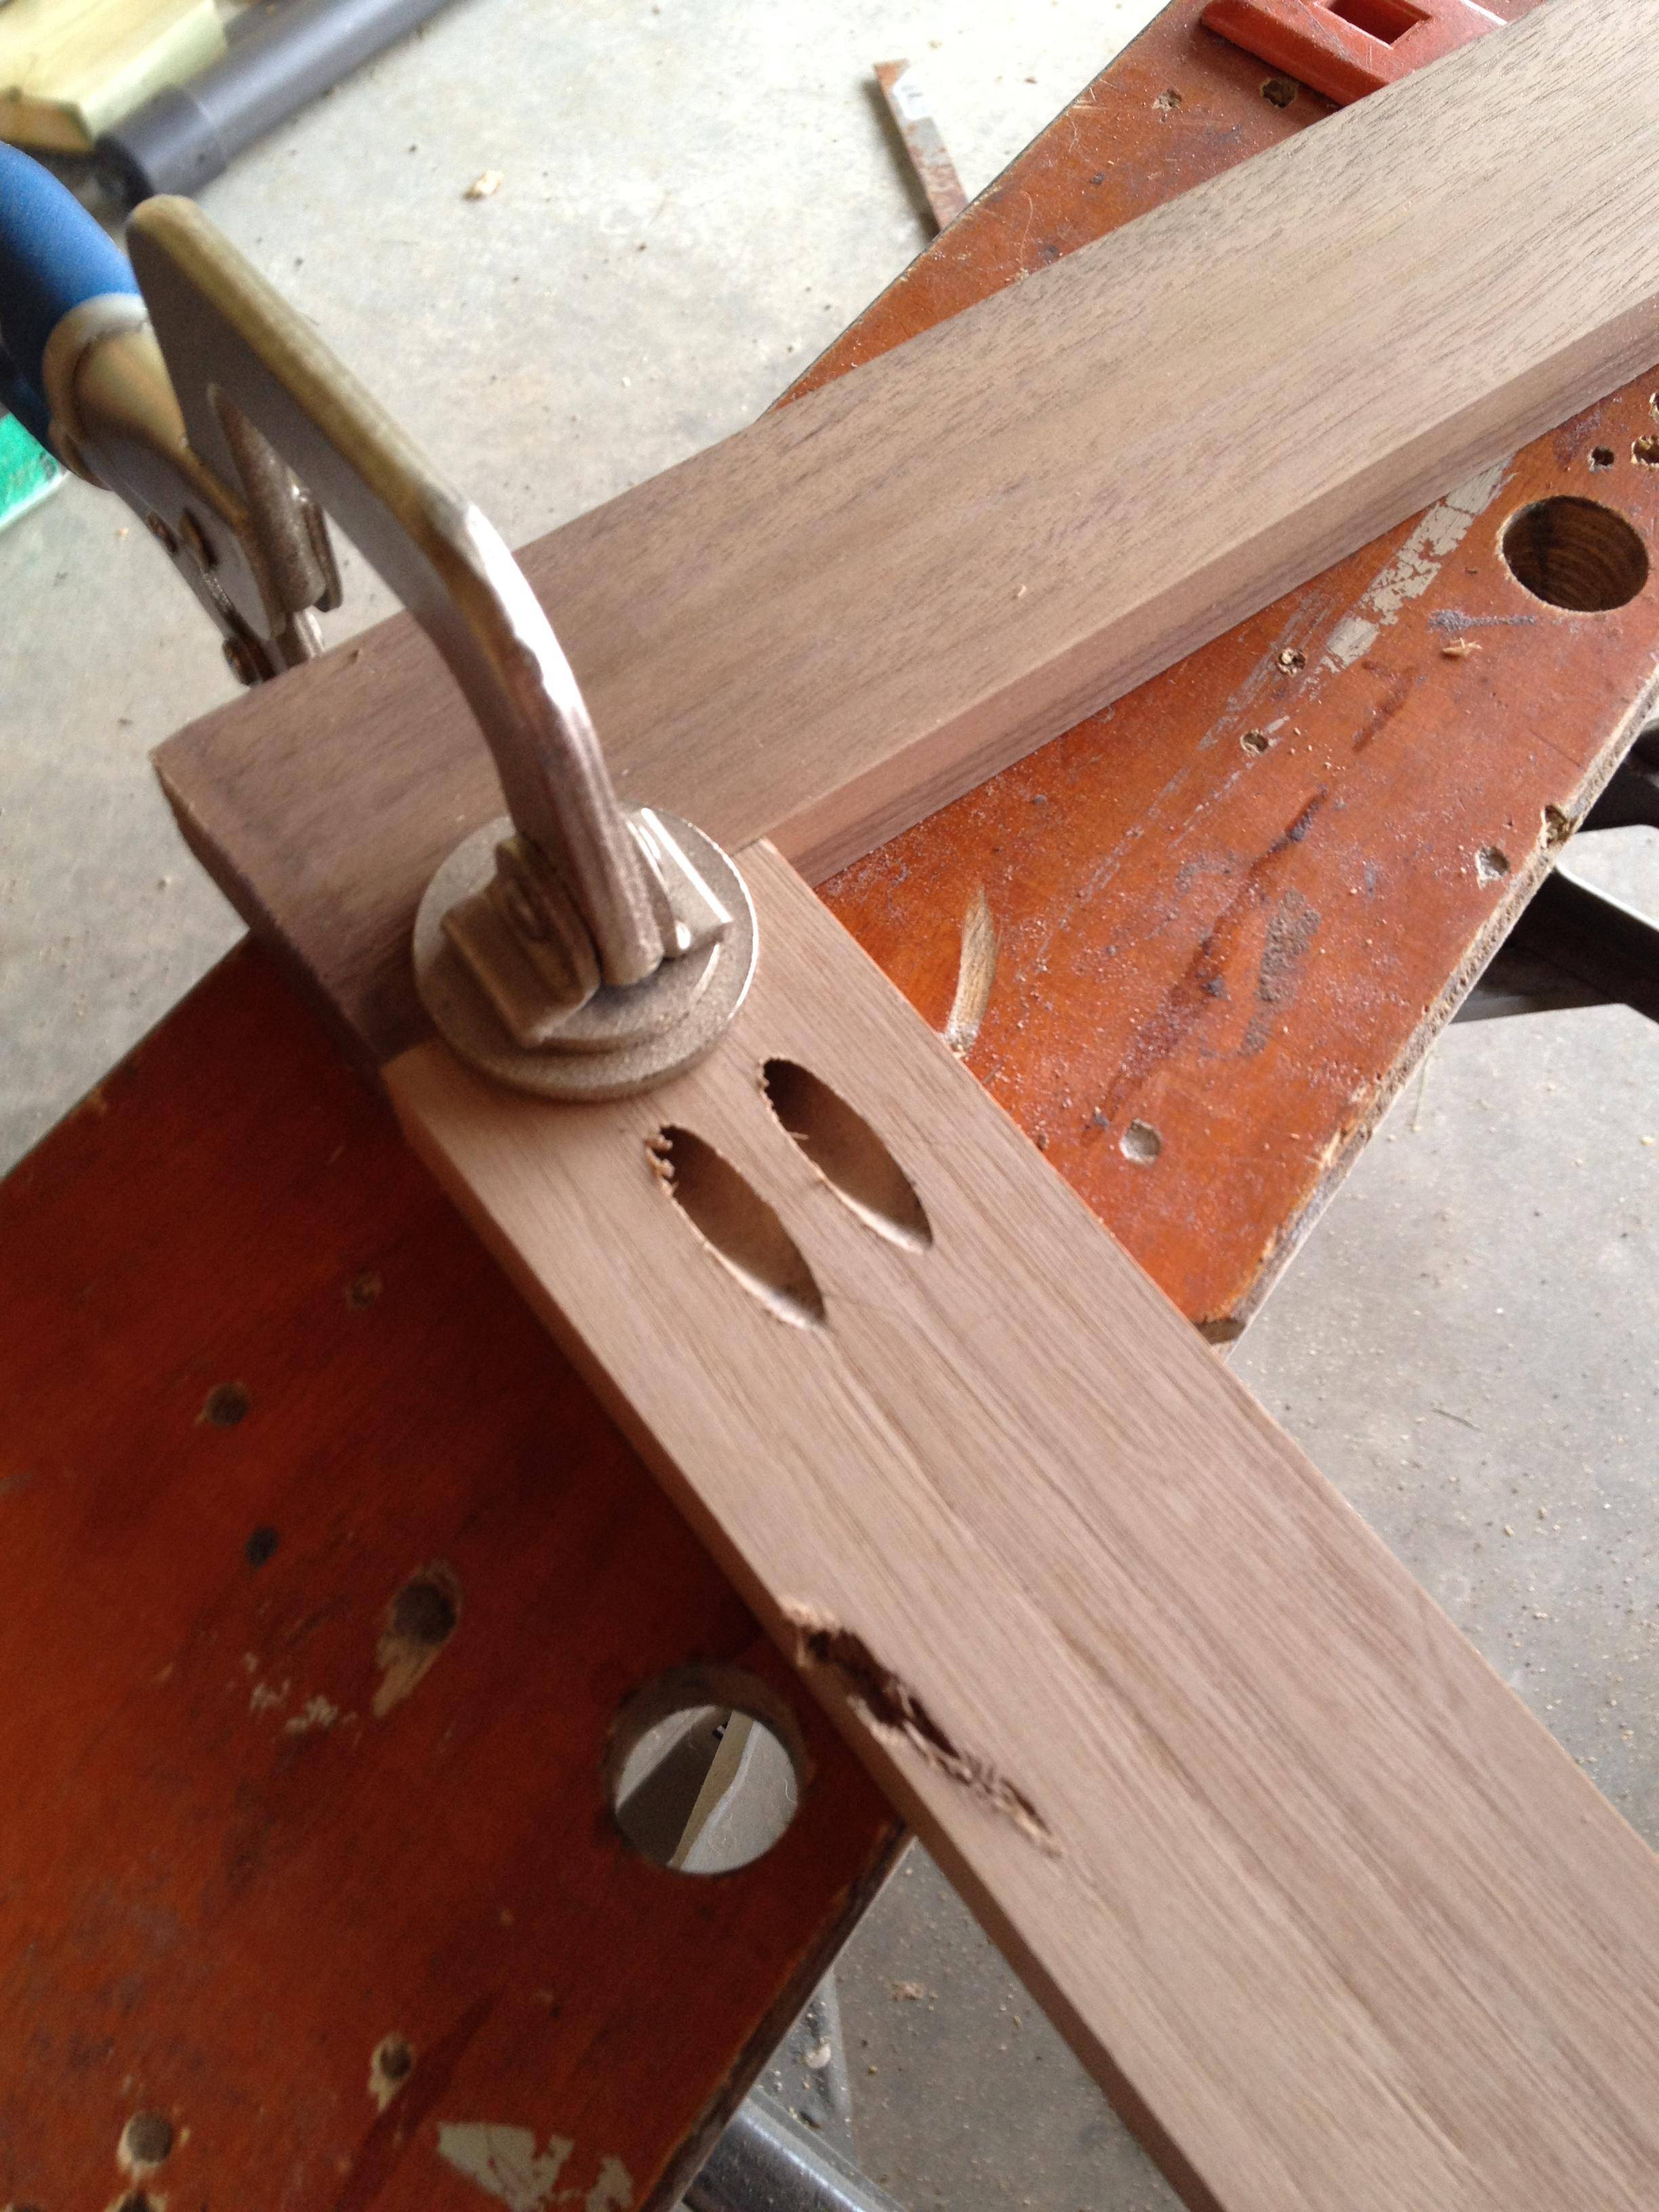
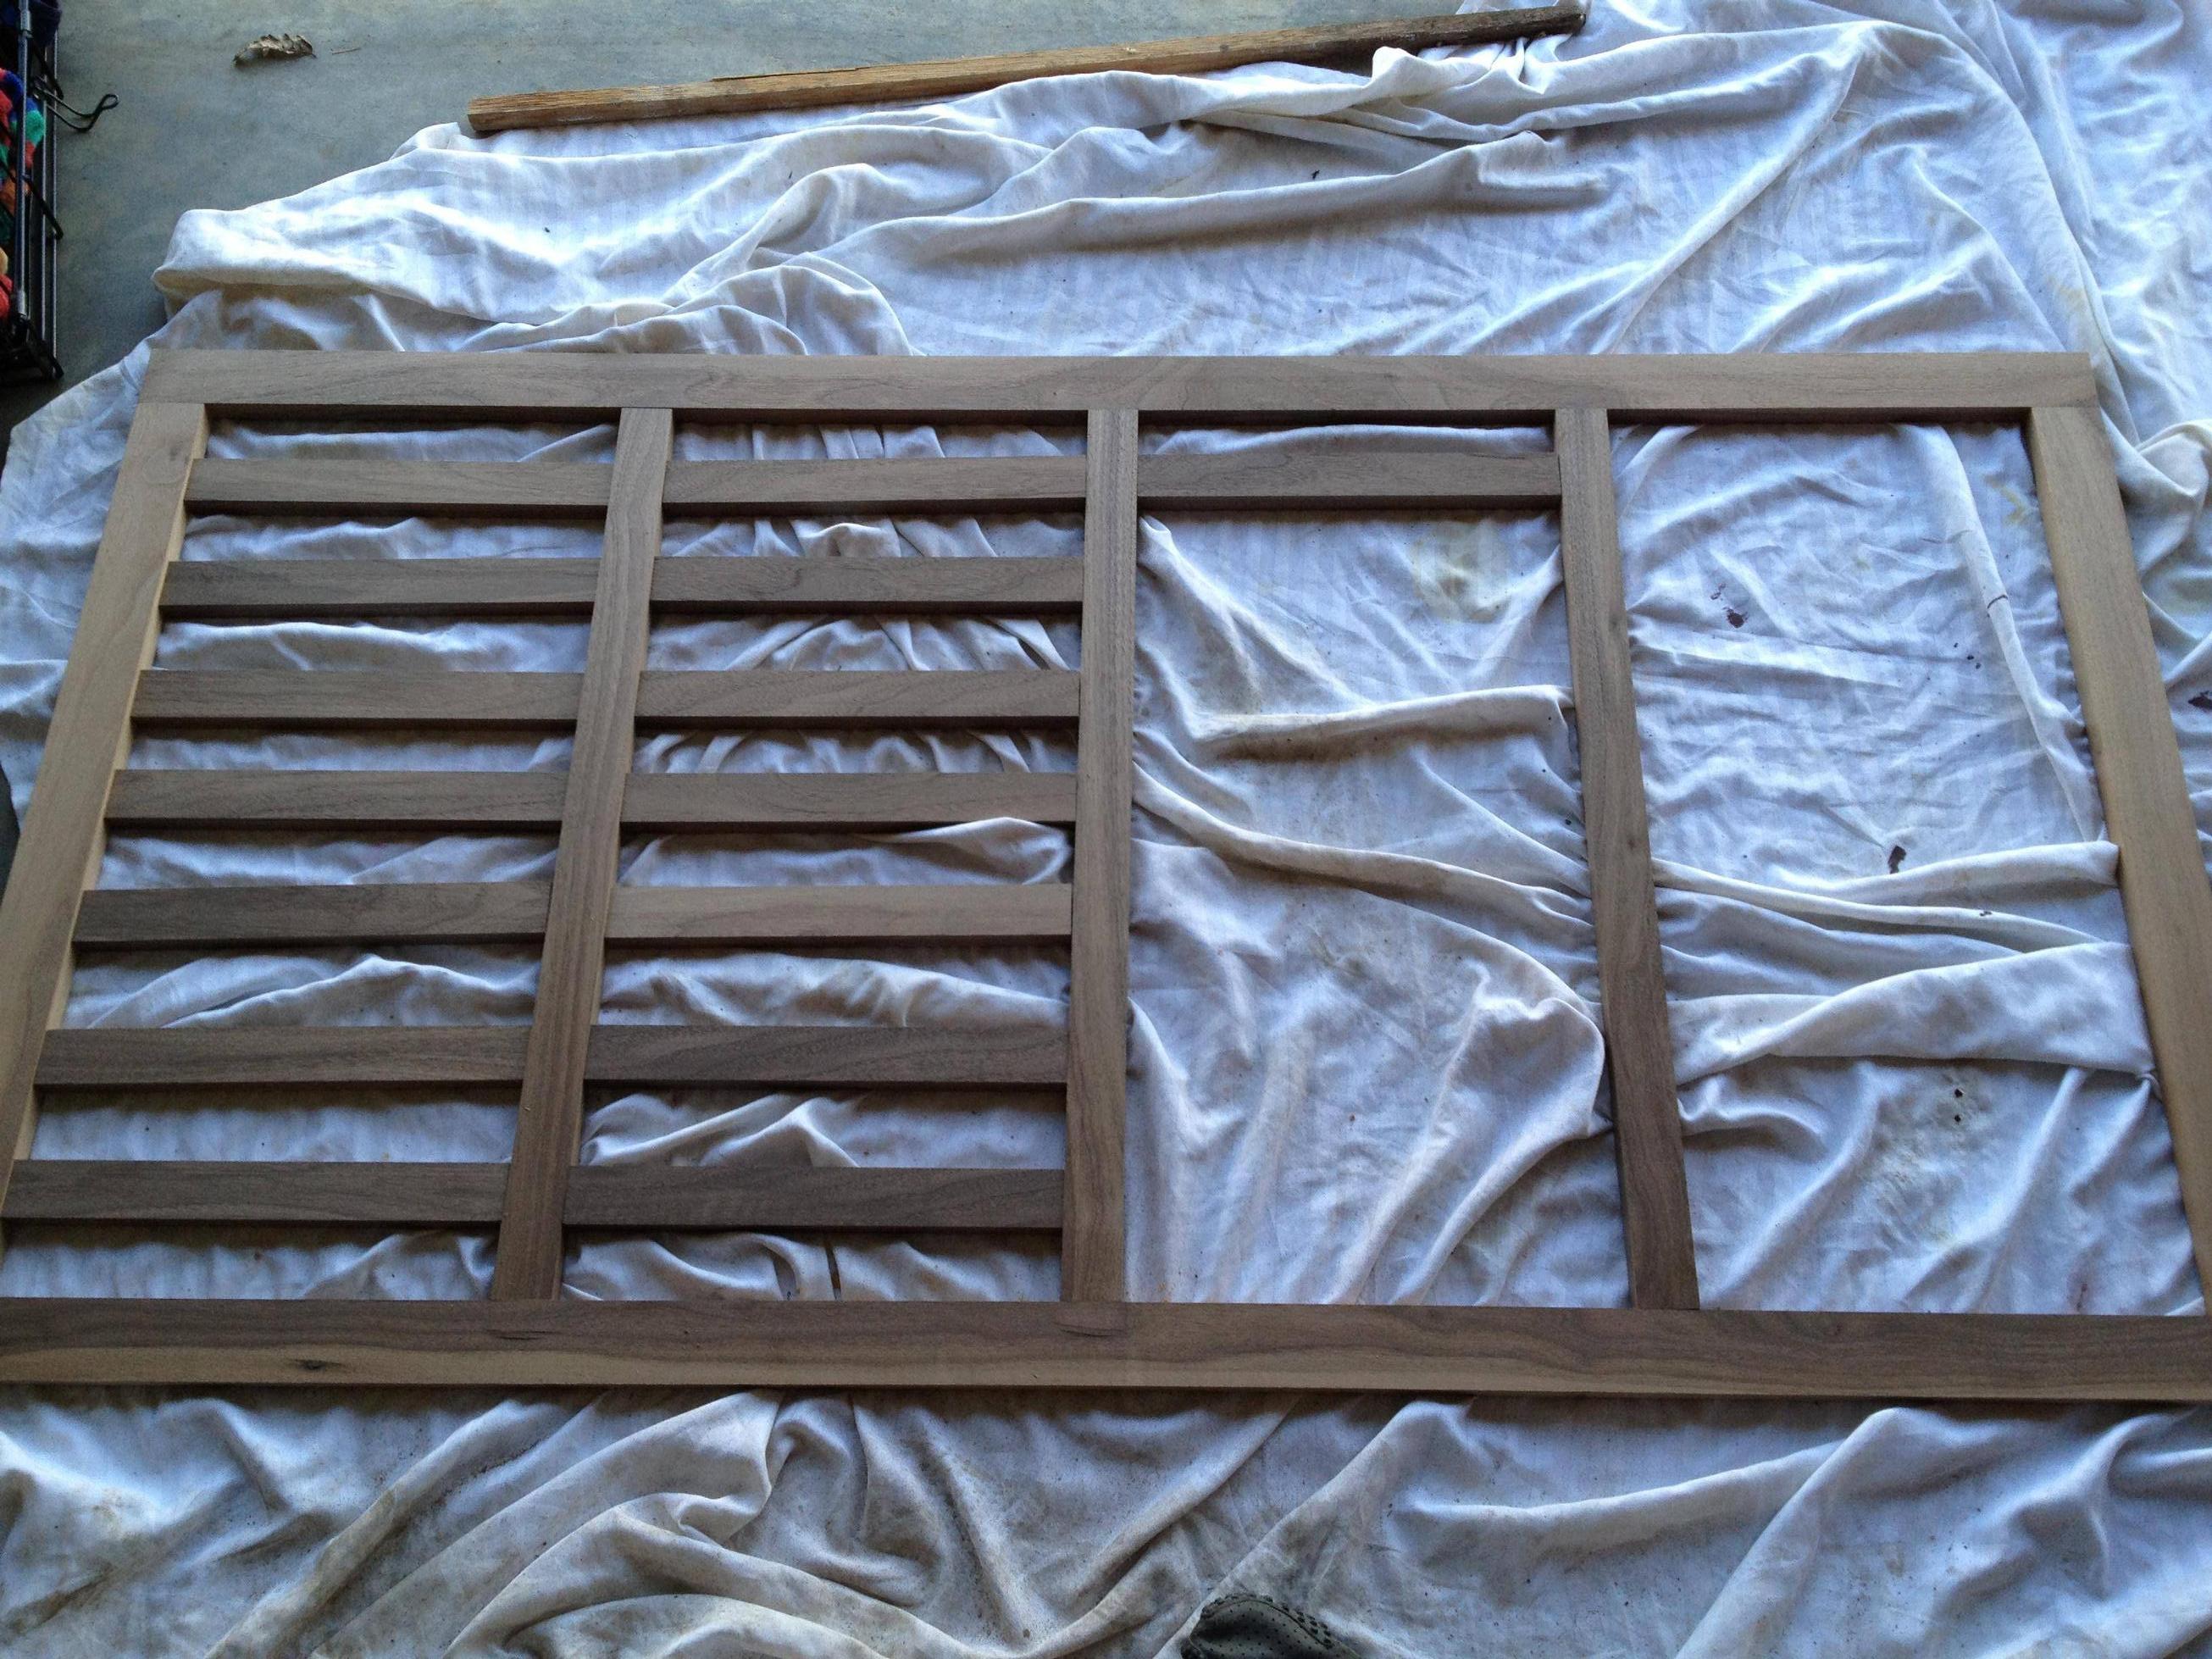
Okay so I purchased 1x2 walnut as well as walnut veneer to dress up that IKEA monster. The 1x2 will be used to make up the “grill” of sorts on the front. I was trying to figure out how I would end up making such a intricate (to me) grill out of wood and came across pocket hole jigs. This thing worked perfectly when you would follow the instructions correctly…I allowed the bit to, somehow, get a bit loose and drop down beyond the amount indicated on the jig and manage to put a little crack in one of the pieces. Beyond that it went very well and is extremely sturdy.
Here is a closeup of the joint with the face clamps:
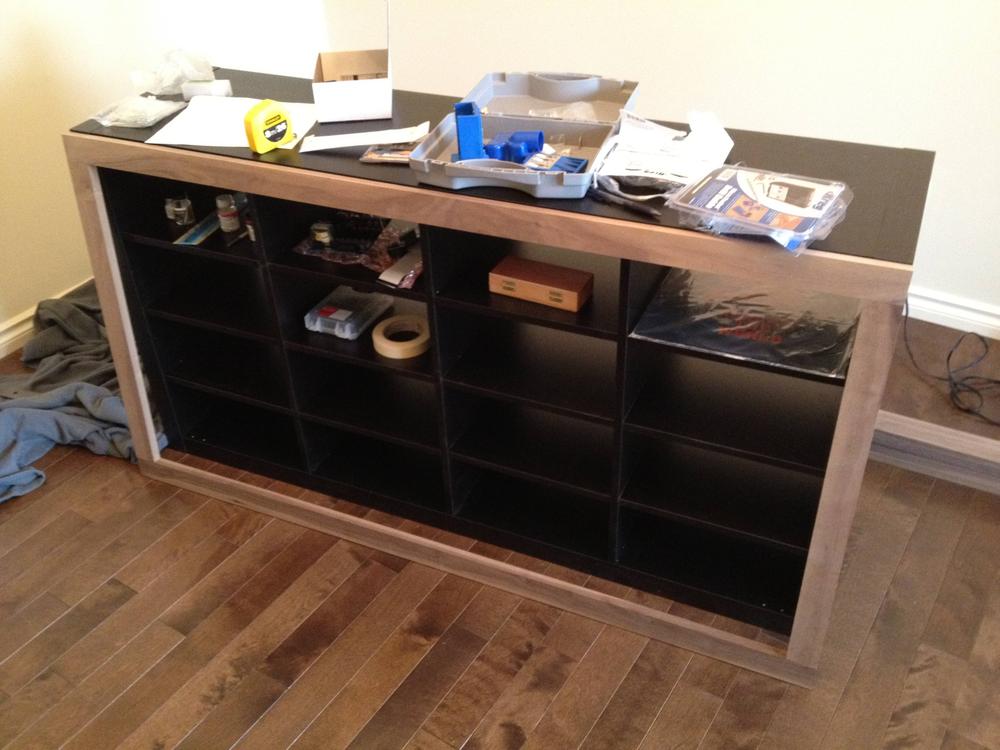
Here is a picture of the frame sitting with the “counter” or whatever you’d like to call it. I plan on re-making this piece as I’m not quite happy with it. I need to get this piece super high gloss but for now it’ll do just fine.
I actually planned the width out with that in mind, if I were to build an inset I could easily fit 2 turntables and a mixer on there ;which I plan on getting at some point soon. All I’d need to do is order another piece of acrylic to raise up the laptop (which I made to be easily removable and was quite cheap). Almost all the work went into the front grill, and the lighting setup, the rest of it it actually pretty easily modifiable (even the height of the unit could be adjusted to accommodate for that).
Looks awesome man. Can’t wait to see the finished product, it will be insane.
It looks like it has more than enough room to hold a mixer and some CDJ/Turntables. And if he needed more room for a laptop or more equipment, it is always possible to expand using built-on or portable stands.
The top will be held down with a few L brackets and was designed to be removable in case my gear setup changes (which is inevitable). Right now the top is made from mdf but it lacks the super high gloss I want so I’ll be making another one in the future out of white acrylic. I’m told very thick white acrylic is hard to come by so I’ll have to source some of that out (won’t get it in time for my party so this will have to do )
Seems to fit quite well, the only issue would be the height of the mixer vs the height of the acrylic laptop stand but again, this is a pretty easy swap out (4 screws) to raise it up.
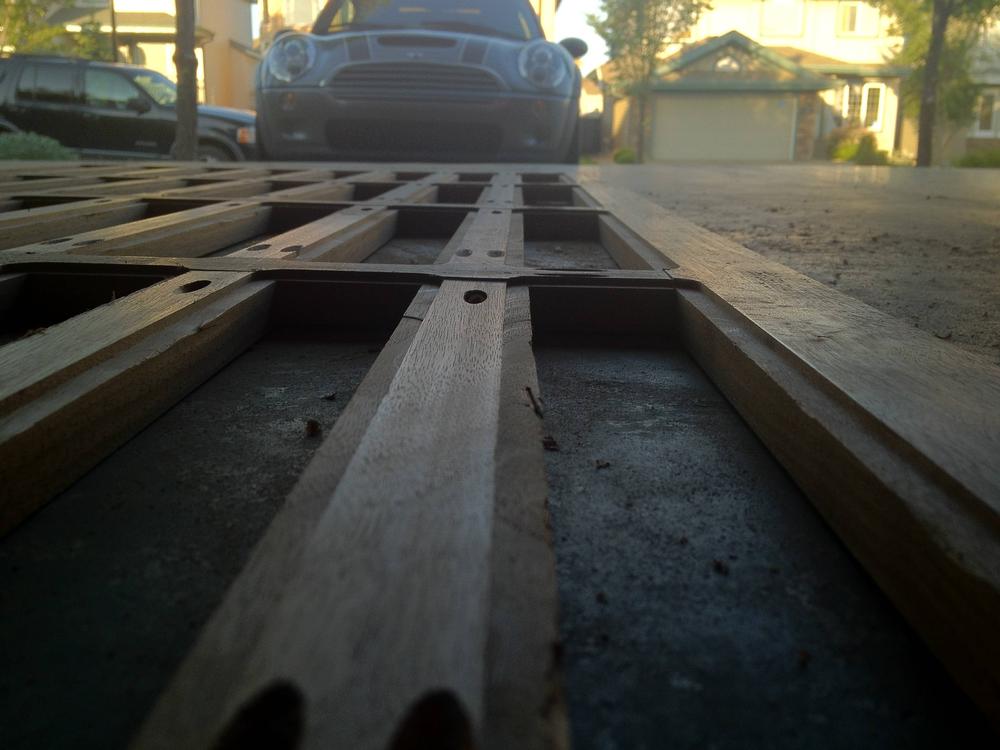
I then decided on how exactly I would mount the tinted plexiglass to the grate structure and decided I’d build it like they put glass in a kitchen cabinet frame. This meant I had an opportunity to add another tool to my collection and a router was purchased along with a number of bits (including the rabbet bit required to set in the plexi)…yay moar tools!
On to the rabbeting out of every spot for the plexiglass to be mounted. I was a bit freaked out about starting this as I was decently proud of figuring out how to make that grating and thought for sure I would somehow crack the frame which wouldn’t be cool at all. Anyways, on to the rabbeting: